Do you have a stainless steel water bottle that's starting to look dingy and dirty? Don't worry, cleaning it is easier than you might think. With just a few simple steps, you can restore your bottle to its original shine and keep it looking great for years to come.
In this step-by-step guide, we'll walk you through the process of cleaning your stainless steel water bottle from start to finish. We'll cover all the supplies you'll need, provide detailed instructions on how to disassemble and clean your bottle, and even share some tips for maintaining a clean bottle over time.
So whether you're dealing with stuck-on grime or just want to freshen up your trusty water bottle, read on for everything you need to know about cleaning stainless steel water bottles like a pro!
Gather Your Supplies

You'll want to gather all of your supplies before beginning, so grab a soft-bristled brush, dish soap, vinegar, and baking soda. Choosing safe cleaners for your stainless steel water bottle is important because harsh chemicals can damage the material.
Dish soap is a great option as it's gentle yet effective at removing dirt and grime. Another benefit of stainless steel is that it's naturally resistant to bacteria buildup. However, regular cleaning will still help ensure your water stays fresh and free from any unwanted odors or tastes.
Baking soda is a natural deodorizer that can help eliminate any lingering smells inside your bottle. Lastly, vinegar can be used to remove tough stains or mineral buildup. Simply mix equal parts vinegar and water in your bottle and let it sit overnight before rinsing thoroughly with water.
With these supplies on hand, you'll be ready to tackle even the toughest cleaning jobs for your stainless steel water bottle.
Disassemble Your Bottle
To ensure a thorough cleaning, it's important to take apart your bottle into its individual components. Proper disassembly is crucial in maintaining the longevity and effectiveness of your stainless steel water bottle. Here are some tips for proper disassembly, avoiding damage, and keeping your bottle in top shape:
- Start by removing the lid or cap from the bottle. Depending on the model, you may need to twist or unscrew it to remove it completely.
- Next, carefully remove any rubber gaskets or seals that are attached to the lid. These can often become dirty and harbor bacteria if not removed during cleaning.
- Finally, separate any additional components such as straws or filters from their housing within the bottle. Pay close attention to how these pieces fit together, so they can easily be reassembled after cleaning.
The benefits of disassembling your stainless steel water bottle for cleaning cannot be overstated. By taking apart each component, you'll be able to clean every nook and cranny thoroughly - leaving no surface untouched by soap and hot water. Additionally, removing all parts allows for a more efficient drying process, which reduces the risk of mold growth or other unwanted buildup inside the bottle.
Overall, proper disassembly is an essential step in keeping your stainless steel water bottle clean and functioning properly over time. Take care when separating each component and make sure to keep track of all parts during cleaning so they can easily be reassembled afterward. With a little bit of effort upfront, you'll enjoy cleaner drinking water with every use!
Pre-Rinse Your Bottle
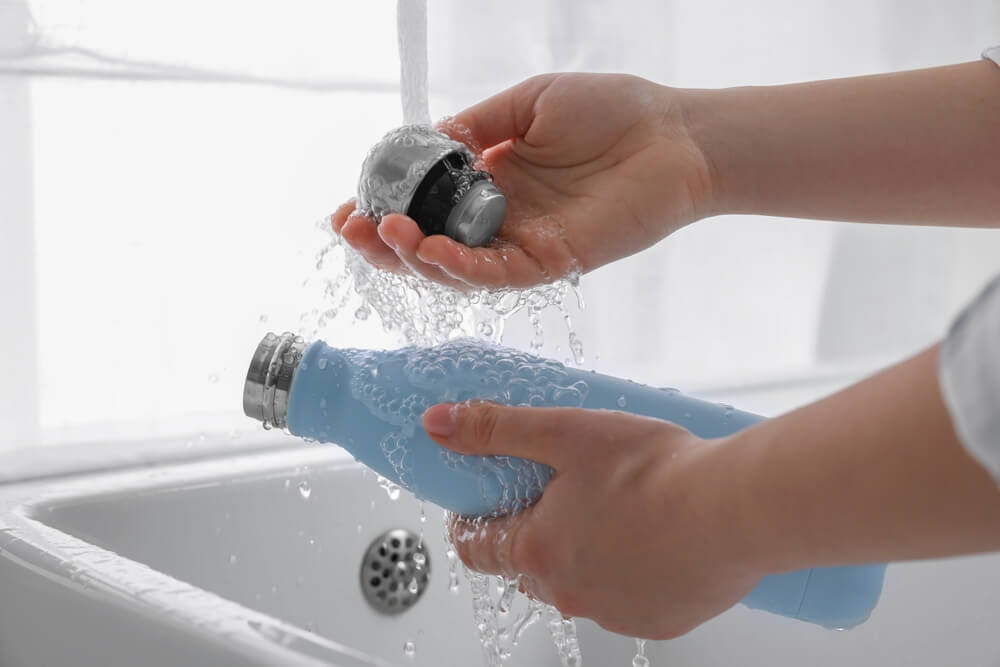
Before diving into the cleaning process, make sure to give your bottle a quick pre-rinse to remove any loose debris or residue that may have accumulated. This step is crucial as it helps prepare the bottle for thorough cleaning later on.
It's also important to note that skipping this step may result in more difficult cleaning and even damage to your bottle. To pre-rinse your stainless steel water bottle, start by filling it with hot water from the tap.
Hot water is effective in loosening up any gunk or grime that has built up inside the bottle. Swirl the water around vigorously and then pour it out, making sure to get rid of all remnants of debris.
The benefits of using hot water during pre-rinsing are numerous. Not only does it effectively loosen up dirt and grime, but it also kills bacteria that may be lurking inside your bottle. Additionally, hot water can help eliminate any odors that may have developed over time due to prolonged use without proper cleaning.
With a clean slate through pre-rinsing, you're now ready to move on to the actual cleaning process!
Apply Your Cleaning Solution
Now it's time to get down to business and apply the cleaning solution to your trusty reusable container. Before you start, consider using a cleaning solution that's eco-friendly and safe for both you and the environment. You can use vinegar, baking soda, or even lemon juice as alternatives to harsh chemicals.
To apply the cleaning solution, pour it directly into your bottle. Depending on how dirty your bottle is, you may need more or less of the solution. Once you've added enough of the cleaning agent, close your bottle tightly and shake it vigorously for a few seconds. This'll help distribute the cleaning solution evenly throughout the interior of your stainless steel water bottle.
Let the solution sit in your bottle for about 5-10 minutes so it can effectively break down any stubborn grime or residue inside. After this time has passed, empty out the cleaning solution from your bottle and rinse it thoroughly with warm water until no soap suds remain.
With these simple steps, you'll have a sparkling clean stainless steel water bottle without harming yourself or our planet!
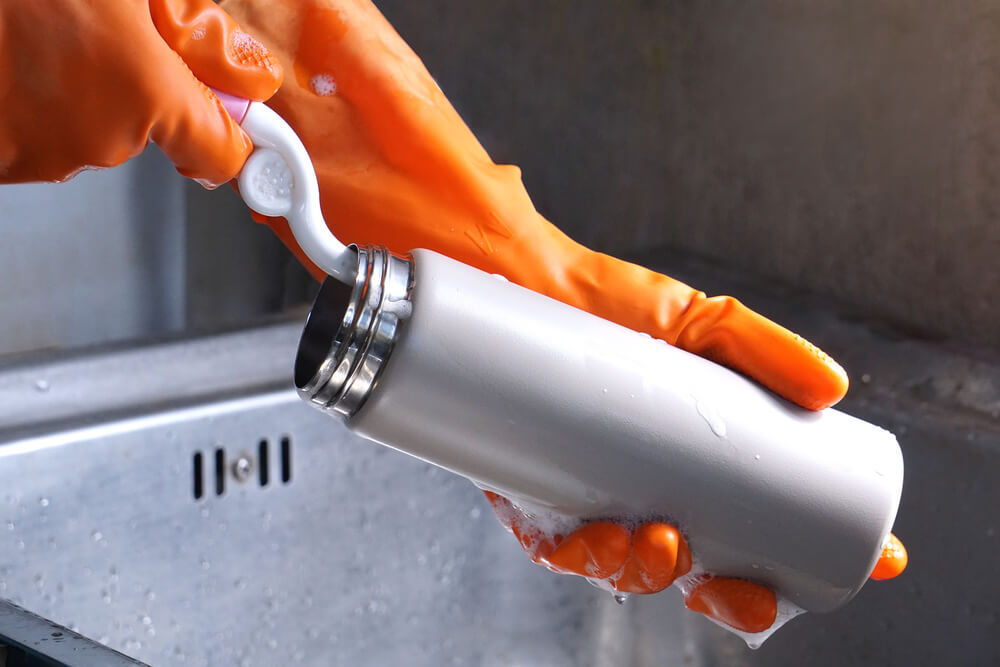
Scrub Your Bottle
Once the cleaning solution has sat for 5-10 minutes, it's time to scrub your bottle. Effective scrubbing techniques should be used to remove any remaining grime or dirt from the interior of your stainless steel water bottle.
The key is to use a gentle but firm pressure and make sure you reach every nook and cranny inside. Choosing the right scrubbing tool is also important. You can use a soft-bristled brush or sponge that won't scratch or damage the stainless steel surface.
A good option is a long-handled bottle brush with soft bristles that can easily reach the bottom of your container. Avoid using abrasive materials such as steel wool, scouring pads, or hard-bristled brushes since they can leave scratches on your water bottle. When scrubbing, start at the top of your container and work your way down to avoid missing any spots.
Pay close attention to areas around the mouthpiece and any crevices where bacteria could hide. Scrub in circular motions until all visible dirt has been removed. Rinse thoroughly with clean water afterward to ensure that all cleaning solution and debris have been washed away completely.
Rinse Your Bottle
Make sure your bottle is completely free of any cleaning solution and debris by giving it a thorough rinse with clean water. It may seem like an unnecessary step, but the importance of rinsing cannot be overstated.
Any residue left behind from cleaning solutions can contaminate your water and harm your health. Plus, debris left in the bottle can create a breeding ground for bacteria.
Taking the time to rinse your stainless steel water bottle also has other benefits that go beyond just keeping it clean. Regular cleaning helps prevent odors and keeps your drink tasting fresh. It also prevents discoloration or staining from buildup over time, ensuring that your bottle stays looking brand new for longer.
Overall, rinsing your stainless steel water bottle is a quick and easy step that should not be overlooked when it comes to maintaining its cleanliness and longevity. So take a few extra seconds to give it a good rinse after scrubbing, and you'll reap the rewards of having a sparkling clean container for all of your hydration needs!
Dry Your Bottle
Now that you've rinsed your stainless steel water bottle, it's time to dry it off.
There are two main methods for drying your bottle: towel drying and air drying.
If you prefer a quick and effective method, towel dry your bottle using a clean cloth or paper towel.
Alternatively, if you have some extra time and want to avoid any potential scratches from towels or cloths, air drying is a great option.
Towel Drying
After wiping down your stainless steel water bottle, gently dry it with a soft towel to avoid any water spots or streaks and ensure that it looks as good as new. Towel drying techniques are crucial in maintaining the shiny appearance of your bottle.
Here are some tips to follow:
- Use a microfiber towel or any soft cloth to prevent scratches.
- Wipe the outside and inside of the bottle thoroughly.
- Pay extra attention to areas where water may collect, such as around the rim or cap.
- If necessary, use a second dry towel to get rid of excess moisture.
Preventing water spots on your stainless steel water bottle is essential in keeping its polished look intact. By following these simple towel drying techniques, you can keep your bottle looking clean and pristine for years to come.
Air Drying
To maintain the quality of your stainless steel water bottle, it's best to let it air dry after cleaning. This is because using a towel or cloth to dry the bottle can leave behind lint and fibers that can contaminate the surface of the bottle.
Additionally, wiping down the inside of the bottle with a towel may not effectively reach all areas, leaving moisture trapped and potentially leading to bacterial growth.
There are several benefits to air drying your stainless steel water bottle. First and foremost, it's an easy and hands-off way to ensure that your bottle is completely dry before use. Air drying also eliminates any risk of contaminating the surface with fibers or lint from a towel.
If you're short on time, there are alternatives to air drying such as using a clean paper towel or blow dryer on low heat setting. However, keep in mind that these methods may not be as effective at removing all moisture from hard-to-reach areas within the bottle.
Reassemble Your Bottle
You're almost there! Assemble your bottle back together and feel the satisfaction of completing a thorough cleaning. Proper assembly is crucial to ensure that your water bottle functions properly and stays leak-free. Before reassembling, make sure all parts are completely dry.
Here are some tips to help you with proper assembly:
- Align the threads: Make sure the cap thread aligns with the bottle thread. This will prevent any leaks.
- Check for loose parts: Double-check that all parts are in their correct place, including gaskets or seals.
- Tighten it up: Screw on the cap tightly but not so tight that it becomes difficult to open.
Now that you've learned about proper assembly, it's important to keep in mind the importance of sterilization.
After assembling your bottle, fill it up with hot water and a drop of dish soap. Shake well and rinse thoroughly before using it again.
Following these simple steps will keep your stainless steel water bottle clean and safe for use, ensuring that you stay hydrated without any worries!
Optional Steps for Deeper Cleaning
For an even more satisfyingly clean bottle, you can go the extra mile with these optional steps. First, try the boiling method. Fill a pot with enough water to submerge your water bottle and bring it to a boil.
Once the water is boiling, carefully place your stainless steel bottle into the pot and let it boil for about 10 minutes. After boiling, use tongs or oven mitts to remove your bottle from the pot and let it cool down before handling.
This method is effective in killing any bacteria that may be lingering on your bottle's surface. However, be careful not to overdo it as excessive heat can damage or deform your water bottle. Another option is the vinegar soak.
Mix equal parts of white vinegar and hot water in a bowl big enough to fit your stainless steel bottle. Let your water bottle sit in the solution for at least an hour, or overnight for tougher stains or odors. Rinse thoroughly with hot water afterwards and air dry upside down on a dish rack.
By following these optional steps for deeper cleaning, such as using the boiling method or vinegar soak, you'll ensure that all bacteria are killed off and any tough stains or odors are removed from your stainless steel water bottle, leaving it fresh and ready to reuse!
Tips for Maintaining a Clean Bottle
Keeping your reusable bottle clean is easy with these simple tips. Preventive measures are key to maintaining a clean bottle. Make sure to rinse it out after each use, and let it air dry before putting the cap back on. This will prevent any bacteria from growing inside the bottle.
Another eco-friendly option is to use vinegar or baking soda to clean your bottle. Simply fill it up with warm water and add a few tablespoons of either vinegar or baking soda. Let it sit for an hour, then rinse thoroughly with hot water. This will help remove any stubborn stains or odors in the bottle without using harsh chemicals.
Lastly, make sure you store your bottle properly when not in use. Keep it in a cool and dry place, away from direct sunlight or high temperatures. You can also invest in a storage bag or sleeve that will protect your bottle from scratches and bumps while traveling.
By following these simple tips and taking preventive measures, you can maintain a clean and eco-friendly reusable water bottle for years to come!
Conclusion
Congratulations, you've successfully cleaned your stainless steel water bottle! By following this step-by-step guide, you can ensure that your bottle is thoroughly cleaned and ready for use. Remember to gather all of your supplies and take apart your bottle before beginning the cleaning process.
Pre-rinse your bottle with hot water and apply a cleaning solution of your choice. Scrub the inside and outside of the bottle with a brush or sponge, making sure to pay extra attention to any hard-to-reach areas. Once you've finished scrubbing, dry off the bottle completely before reassembling it.
If you want to go above and beyond for an even deeper clean, try some optional steps like using baking soda or vinegar as a natural cleaner. And don't forget to maintain your clean bottle by regularly rinsing it out after each use and avoiding leaving liquids in it for long periods of time.
By taking care of your stainless steel water bottle, you're not only keeping it looking shiny and new but also ensuring that no harmful bacteria or odors are lingering inside. Keep up the good work!